This is the first article of a 2-part series, where we explain in full how to automate your Elixir project’s deployment. The technologies used are AWS, to host your project, and CircleCI, to automate the testing and deployment of the application.
Part II — How to automate the deployment of your Elixir project with CircleCI
AWS Configuration
A basic AWS configuration for your application should consist of various interconnected services, of which EC2 is the most important, as it will host your project and you will be interacting with it quite a lot.
Additionally, we use RDS for the database and Route 53 for the domain management, along with some other minor useful tools. This tutorial is divided into various sequential steps that explain how to fully configure these services, so that you can have a fully working infrastructure you can deploy your code to.
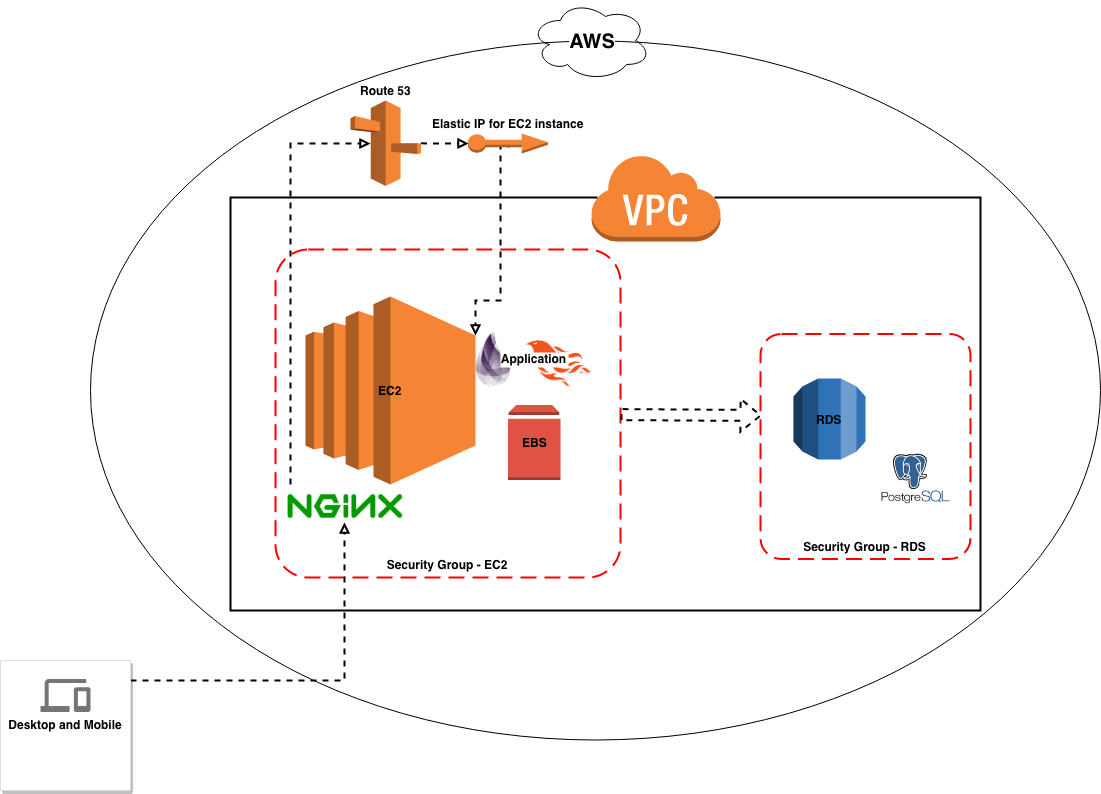 AWS Configuration — General view
If you have troubles finding the services we will be configuring, you can search and access them in the services tab:
 AWS Services tab
A) EC2
We will configure 2 instances one for staging and another for production environment.
1. Create Staging Instance
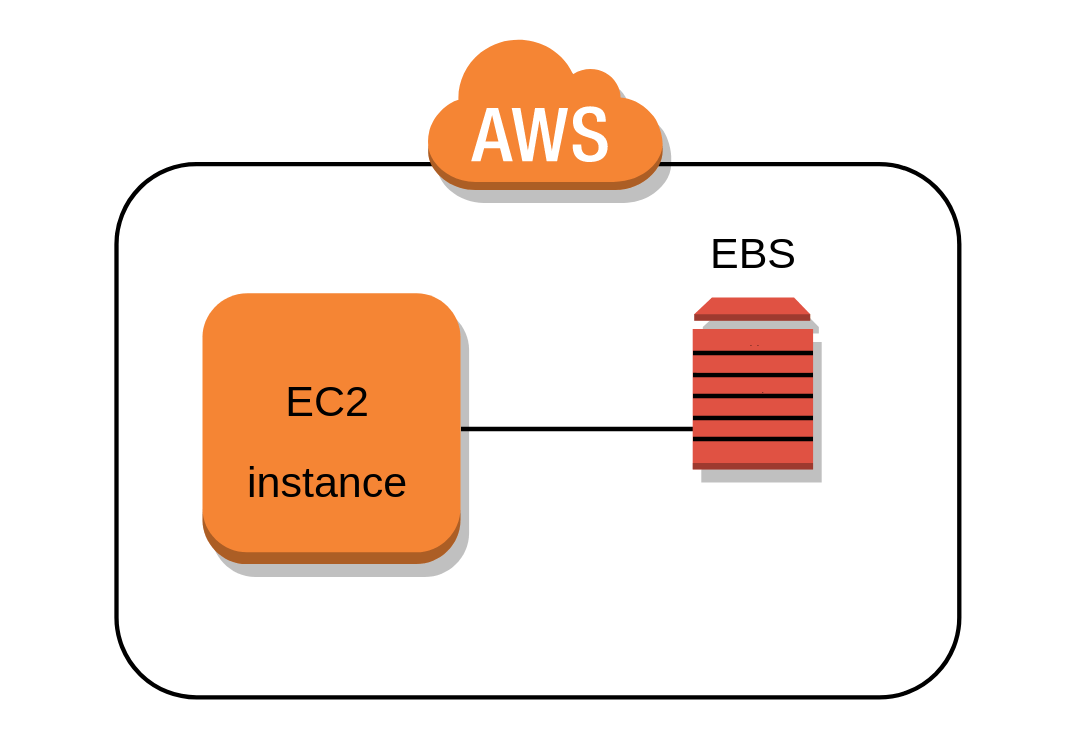 EC2 configuration
Please keep in mind that some services might not be available in certain regions, for our example we are going to use North Virginia.
 AWS services available per region
In this example we are going to use a free tier image of ubuntu 16.0.4 (AMI) with a t2.micro instance composed of 1GB of RAM and 20GB of disk (EBS volume). For your own project feel free to adjust these values to match the project needs. Another important thing is the regions and availability zones and each AWS service may or may not be available for that area.
 Step 1–Choose AMI
 Step 2 — Choose Instance Type
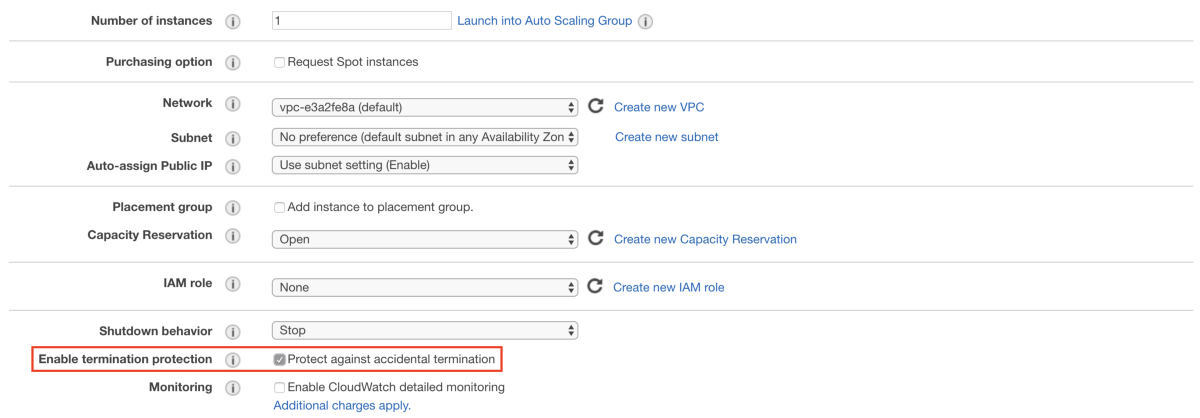 Step 3 — Configure Instance
Please do not forget to check the Protect against accidental termination.
 Step 4 — Add Storage
The last step consists on adding tags to our EC2 instance. This step is not crucial to the configuration and the only purpose of the tags is to identify our instance inside the AWS services, so feel free to add your own tags.
2. Configure the Security Group
The security group is one of the most crucial configurations, as it defines exactly who can access the machine. In our case, we define the SSH, HTTP and HTTPS protocols.
SSH, because we want to be able to access the machine and interact with it via terminal so that we can configure it.
HTTP and HTTPS so that our project can be accessed when deployed.
 Step 6 — Configure Security Group
Warning: Rules with a source of 0.0.0.0/0 allow all IP addresses to access your instance. We recommend setting the security group rules to allow access from known IP addresses only.
3. Create a new Key Pair (for external access to instance)
At the end of the EC2 instance creation process, it is necessary to create a key pair (save the key pair in your machine, so you can configure your SSH access locally).
Create one Elastic IP address associated to the EC2 instance created. The Elastic IP is needed because if, for example, we shutdown this instance and create another one with other characteristics, we simply reassociate the Elastic IP created to the new instance and everything works well.
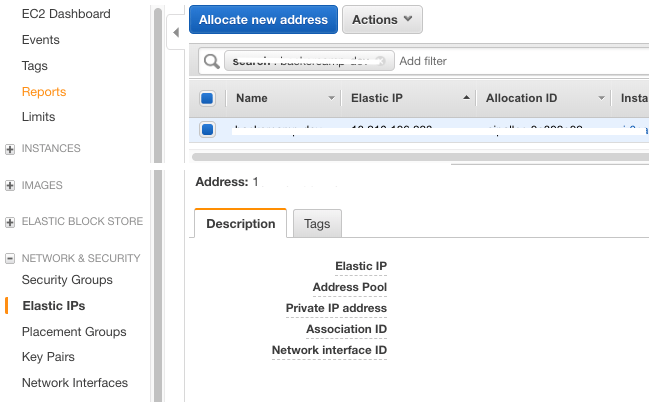 Step 1 — Elastic IP
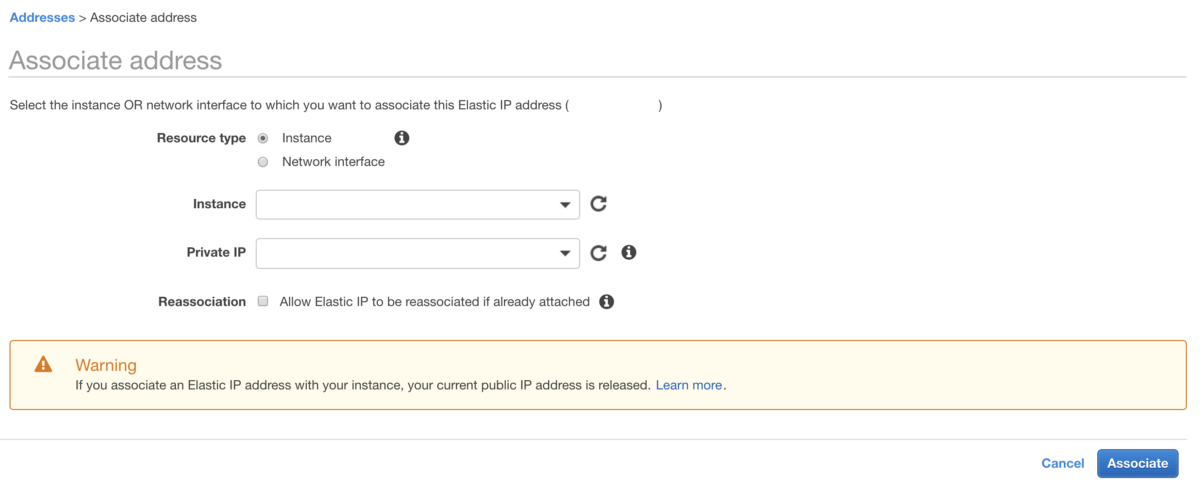 Step 2 — Associate Elastic IP with instance
C) Configure the EC2 Machine
1. Configure SSH Access
###recommended put key-pair.pem in ~/.ssh folder
chmod 400 key-pair.pem

###replace 111.11.111 with the Elastic IP generated
ssh -i key-pair.pem ubuntu@111.11.111
2. Install the tools needed in the EC2 instance
Access the machine and install the necessary software.
You need to install Certbot and then generate an SSL certificate for the domain that your machine will correspond to.
Important: Sometimes you need to run step E) Route 53 first.
# Please replace example.com by your domain
sudo certbot --nginx -d example.com -d [www.example.com](http://www.example.com```)
sudo certbot renew --dry-run
Next, follow steps 3 and 4 of this tutorial.
Warning: Certboot is rate limited.
4. Configure Nginx
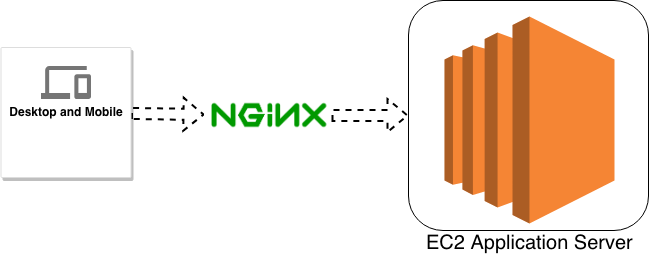 Nginx architecture
Next, you need to configure Nginx to use the certificate you just created for this domain. Navigate to the folder /etc/nginx/sites-available, where you can find the default Nginx file, which looks like the one that follows:
upstream phoenix {
  server 127.0.0.1:4000 max_fails=5 fail_timeout=60s;
}

server {
  root /var/www/html;
  # Add index.php to the list if you are using PHP
  index index.html index.htm index.nginx-debian.html;
  server_name <server_name>;
  location / {
    # First attempt to serve request as file, then
    # as directory, then fall back to displaying a 404.
    try_files $uri $uri/ =404;
  }

  location ~* /api/(?<path>.*$) {
      #set $upstream "http://127.0.0.1:4000/api/";
      allow all;
      proxy_http_version 1.1;
      proxy_set_header X-Forwarded-For $proxy_add_x_forwarded_for;
      proxy_set_header Host $http_host;
      proxy_set_header X-Cluster-Client-Ip $remote_addr;
      # The Important Websocket Bits!
      proxy_set_header Upgrade $http_upgrade;
      proxy_set_header Connection "upgrade";
      #proxy_pass $upstream$path$is_args$args;
      proxy_pass http://phoenix;
  }

  location ~* /socket/(?<path>.*$) {
      allow all;
      proxy_http_version 1.1;
      proxy_set_header X-Forwarded-For $proxy_add_x_forwarded_for;
      proxy_set_header Host $http_host;
      proxy_set_header X-Cluster-Client-Ip $remote_addr;
      proxy_redirect off;
      proxy_set_header Upgrade $http_upgrade;
      proxy_set_header Connection "upgrade";
      proxy_pass http://phoenix;
  }

  if ($scheme = "ws") {
    return 301 wss://$host$request_uri;
  }

  listen 443 ssl; # managed by Certbot
  ssl_certificate /etc/letsencrypt/live/<server_name>/fullchain.pem; # managed by Certbot
  ssl_certificate_key /etc/letsencrypt/live/<server_name>/privkey.pem; # managed by Certbot
  include /etc/letsencrypt/options-ssl-nginx.conf; # managed by Certbot
  ssl_dhparam /etc/letsencrypt/ssl-dhparams.pem; # managed by Certbot
}

server {

  if ($host = <server_name>) {
    return 301 https://$host$request_uri;
  } # managed by Certbot

  listen 80 default_server;
  listen [::]:80 default_server;
  server_name <server_name>;
  return 404; # managed by Certbot
}

server {
  if ($host = <server_name>) {
    return 301 https://$host$request_uri;
  } # managed by Certbot

  server_name <server_name>;
  listen 80;
  return 404; # managed by Certbot
}
Warning: please replace <server_name> by the previously generated server_name.
5. Last settings on the instance
Finally, you need to create the <project-name> folder in /opt. After that we have to pass the control to the user ubuntu.
sudo mkdir <project-name>
sudo chown -R ubuntu:ubuntu <project-name>
6. Create an Image based on the created instance and Create a Production Instance
You can skip this step if you just need to setup a single environment. In our projects we usually start with a staging and a production environment. The staging environment contains all the code done so far and is used to test the latest features before they go into production. The production environment is the one used by the real users.
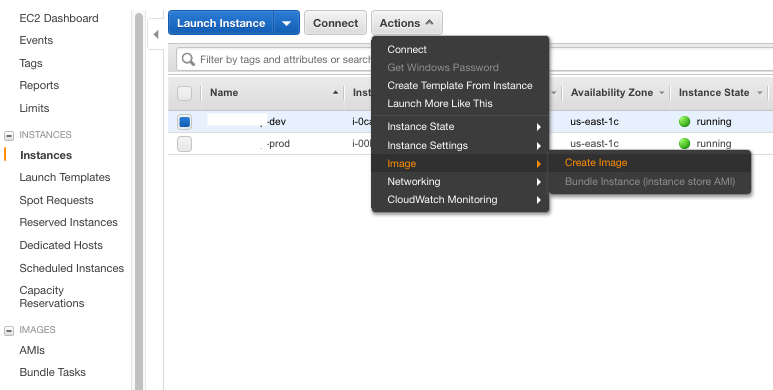 Step 1 — Create an Image based on the created instance
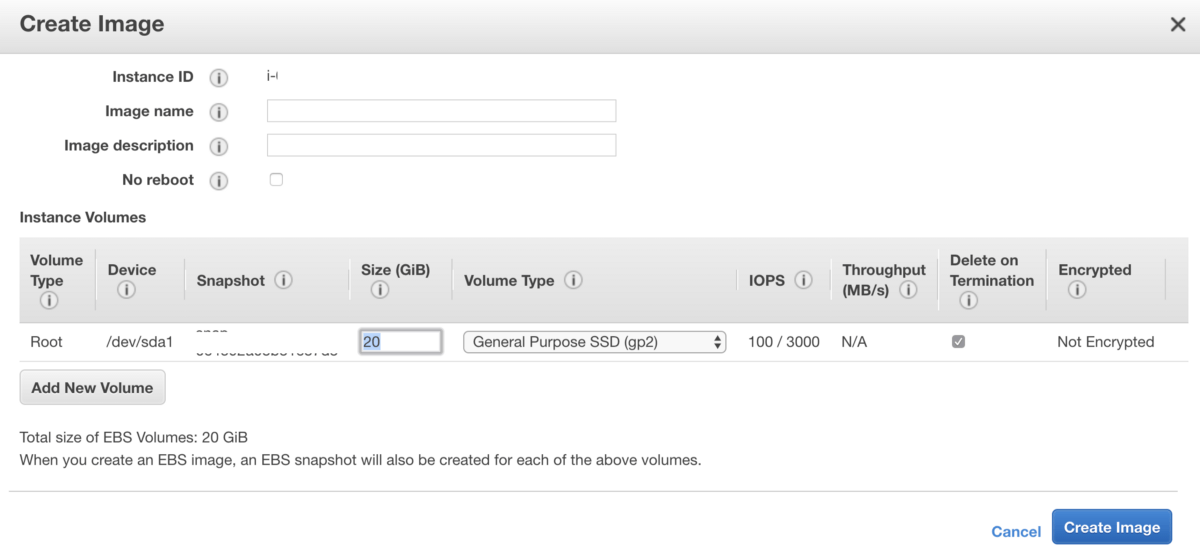 Step 2 — Create image
Create an image (EC2 — AMI) based on the previously created instance (staging instance). Then create the production instance from the image (so we have the two instances created and configured — production and staging).
Don’t forget: save the key pair in your machine to configure your SSH access locally.
For the production instance it is necessary to repeat the following steps:
-
B) Elastic IP (production instance)
-
C) 1. Configure SSH access (production instance)
-
C) 2. Install the tools needed in the EC2 instance
-
C) 3. Install Certbot (production instance)
D) RDS
The example we show you here uses a relational database. In this case, we use Postgres.
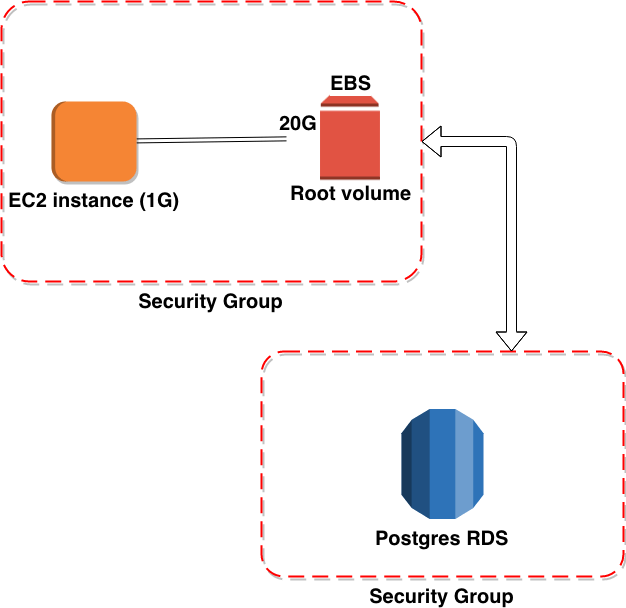 EC2 and RDS configurations
1. Create 2 DB Instances (production and staging)
Careful with the options chosen like: engine version, allocated store and enable deletion protection.
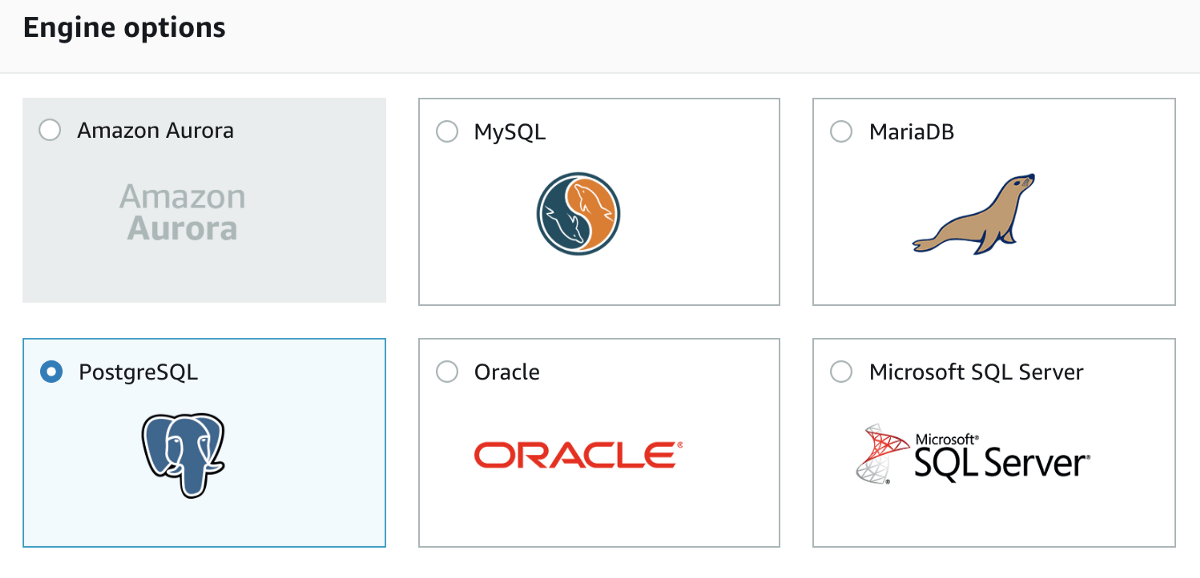 Step 1 — Select engine
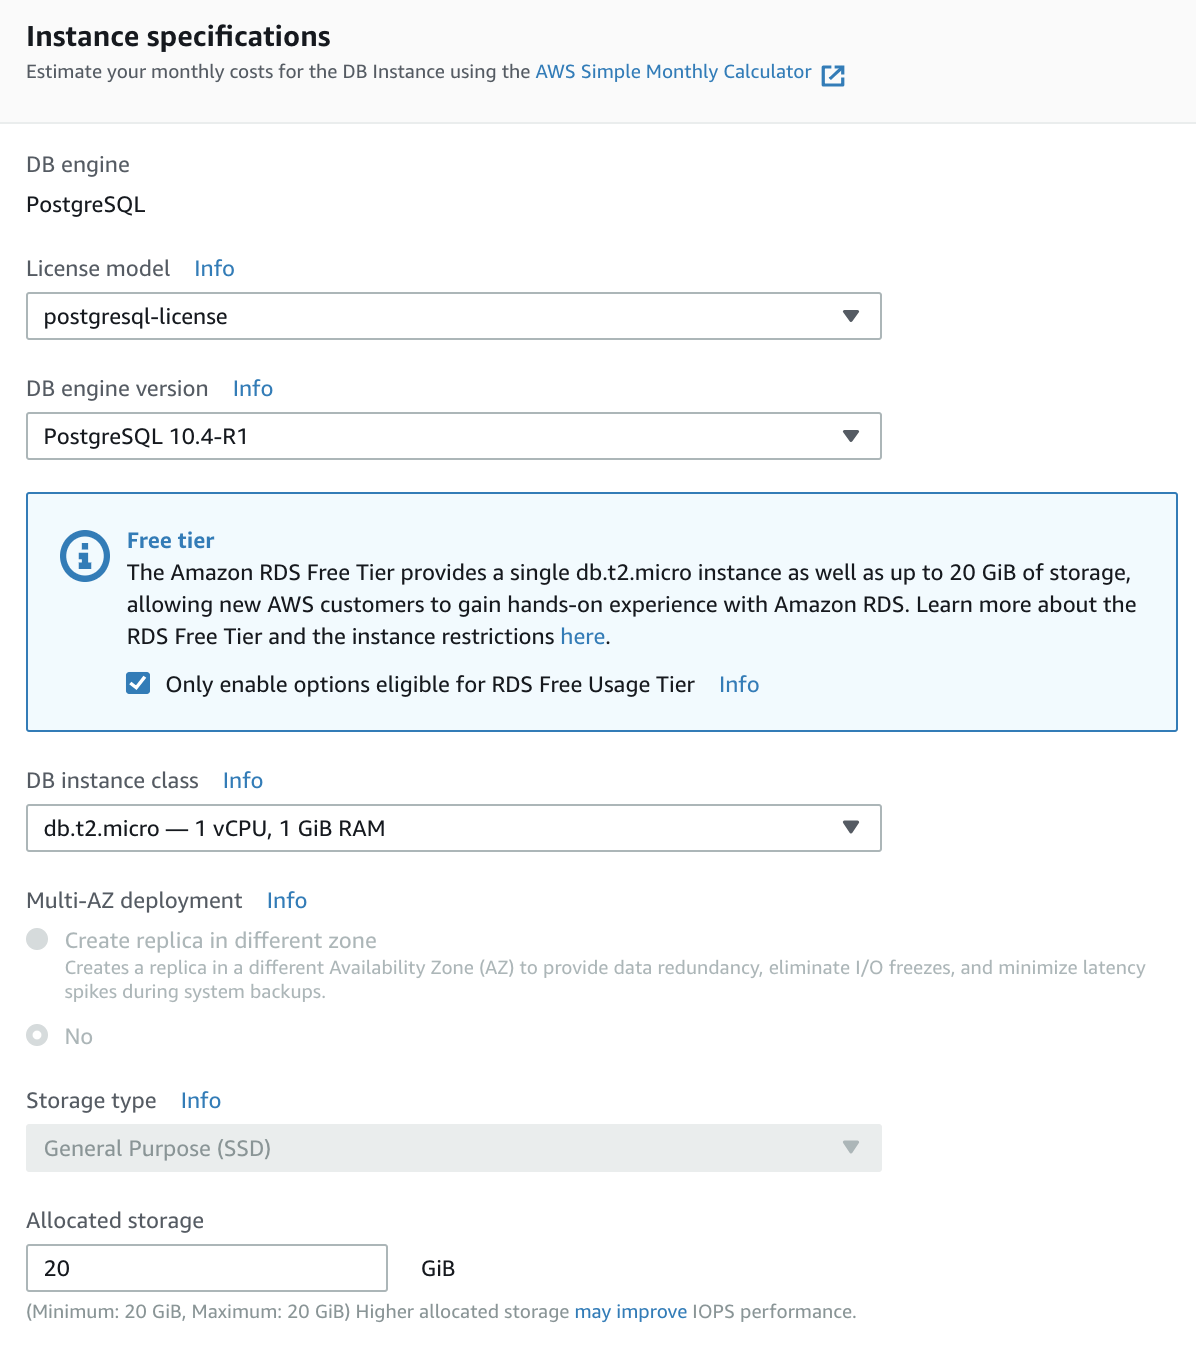 Step 2 — Instance specifications
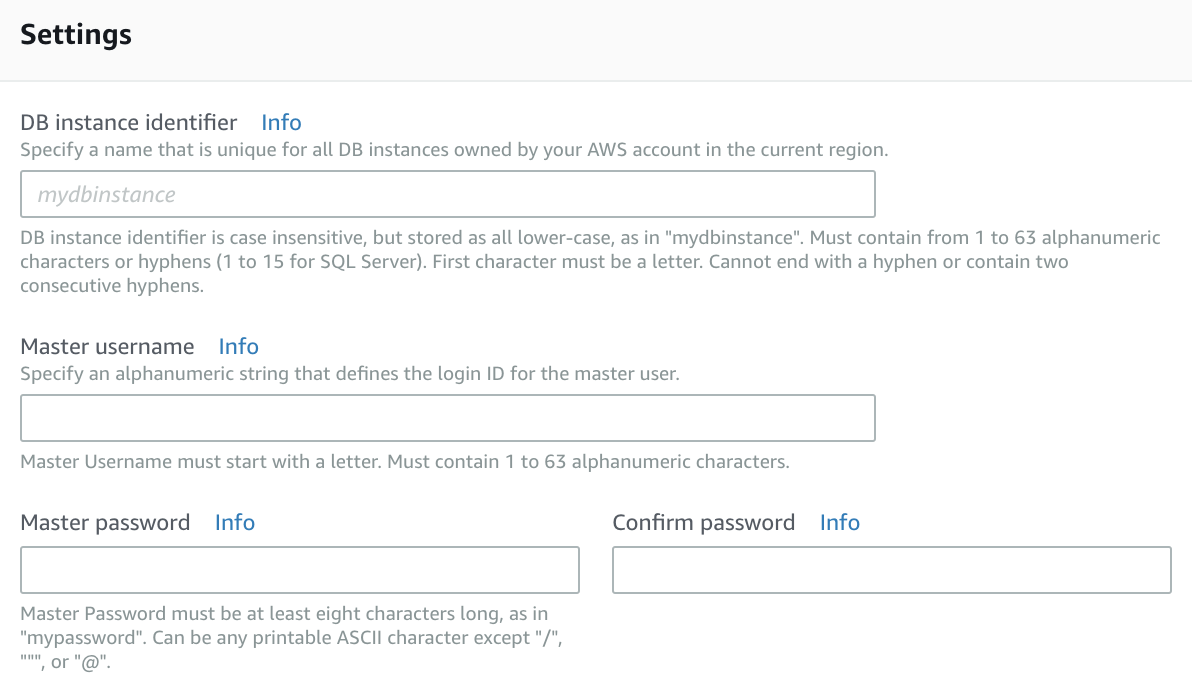 Step 3- Settings
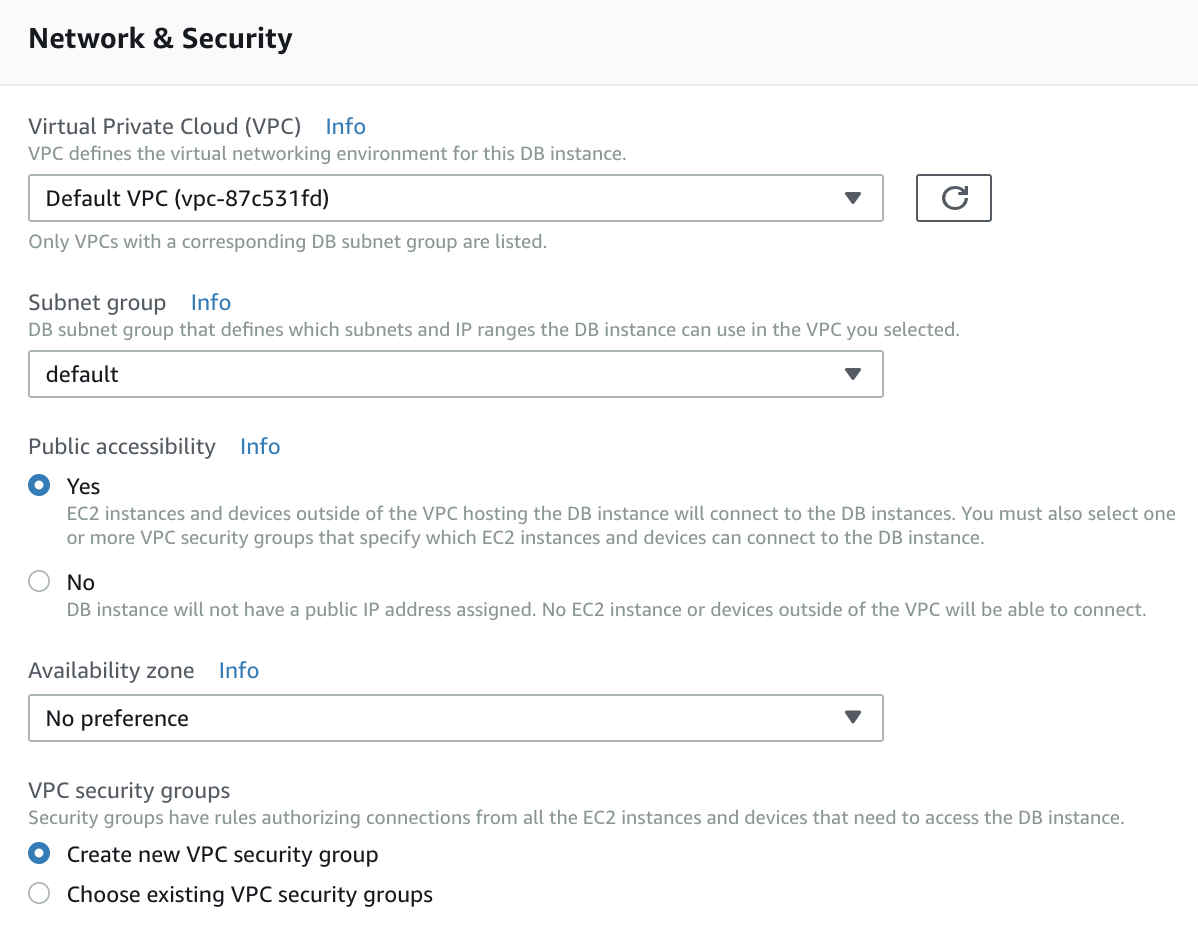 Step 4 — Network & Security
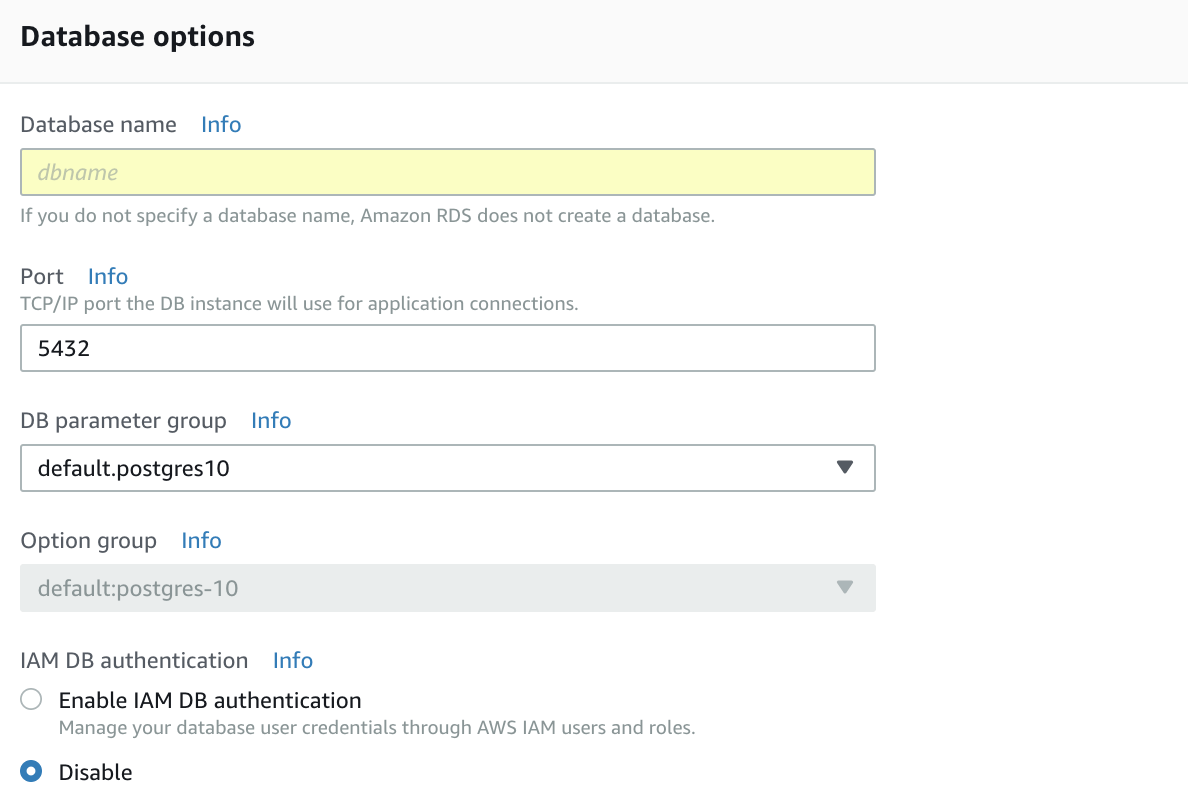 Step 5 — Database options
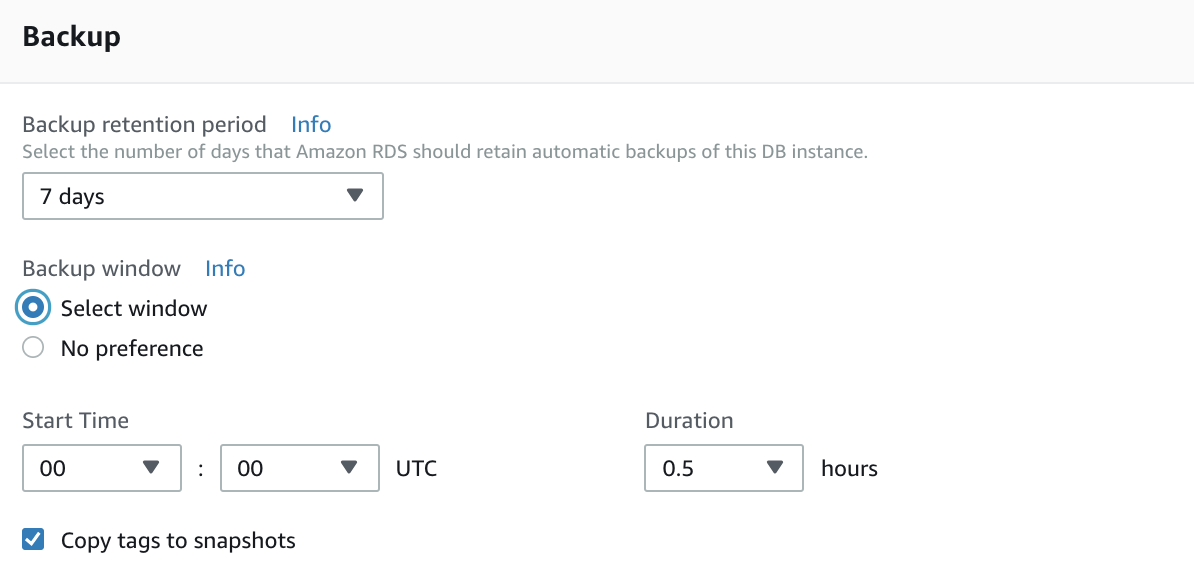 Step 6 — Backup
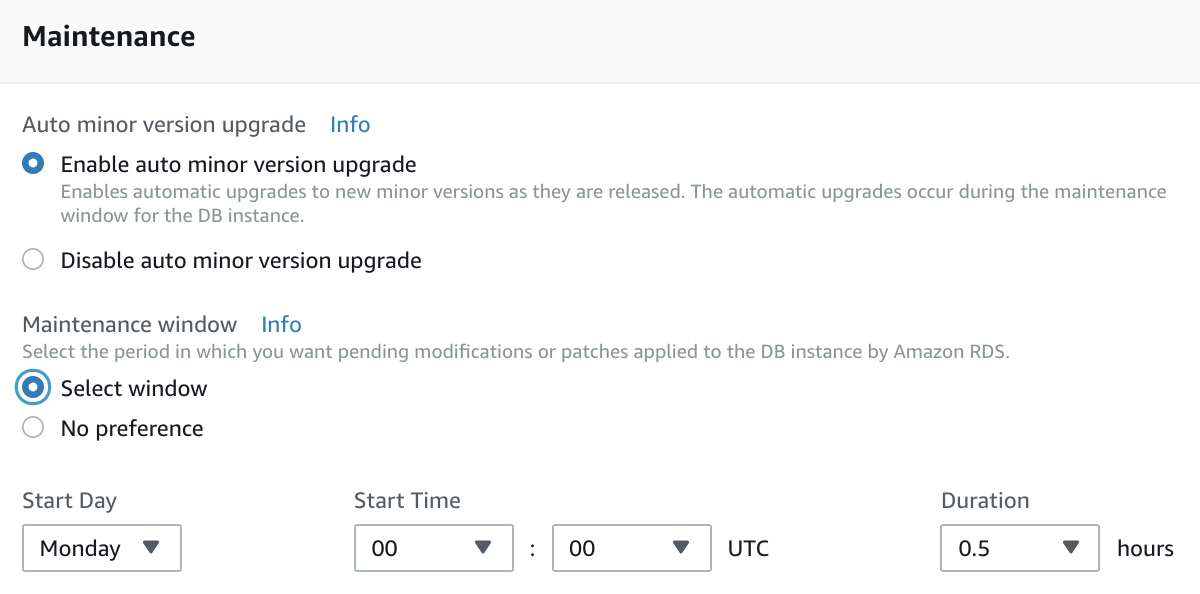 Step 7 — Maintenance
 Step 8 — Deletion protection
2. Configure the Security Group to allow EC2 to connect to the RDS
Basically you have to add the instance security group to the RDS security group in order to allow EC2 to connect to the RDS instance.
 Allow EC2 to connect to the RDS instance
E) Route 53
To route the domains and subdomains to the previously created machines we used Route 53.
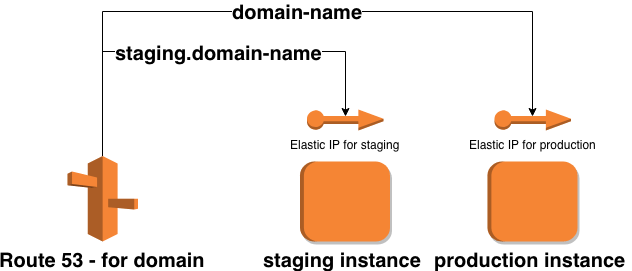 Route 53 — example
1. Create a Hosted Zone with a Domain Name
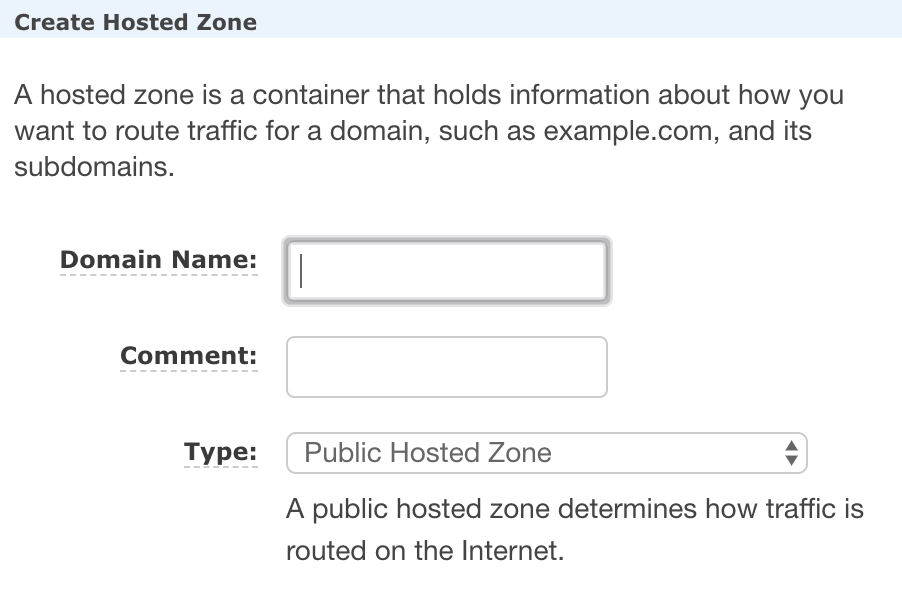 Step 1 — Create a hosted zone
2. Create Aliases
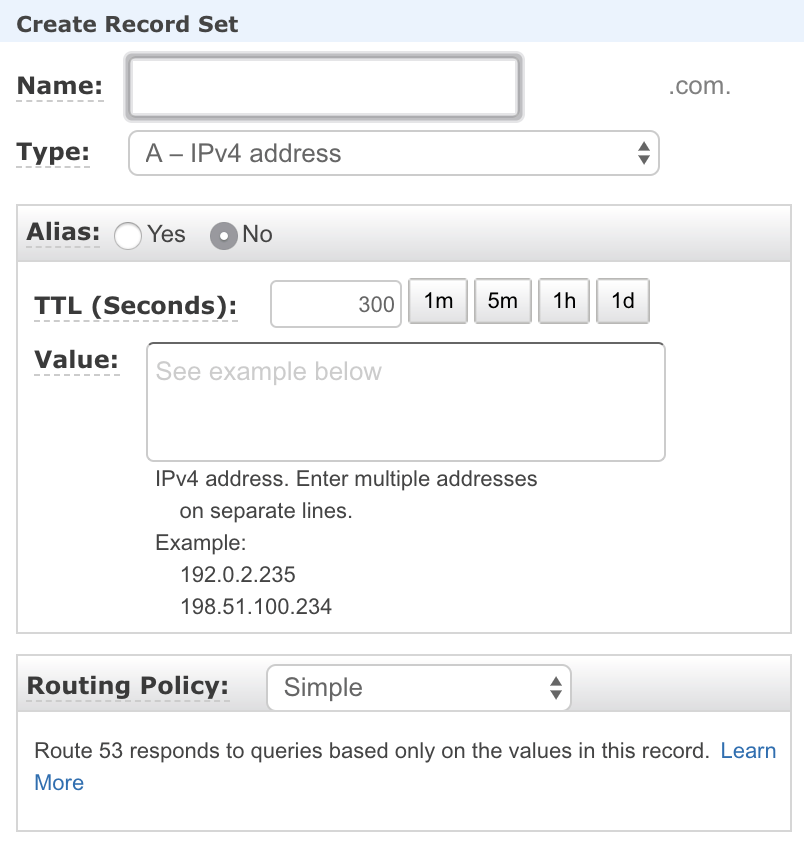 Step 2— Create a record set
You now have a fully functioning AWS setup (routing, database, server instance) ready to receive and host an elixir based server. In the next part of the tutorial we are going to configure CircleCI to automatically deploy your project into the AWS setup we just created.


